Click Here to view a quick tutorial for setting up your Automation Events.
Your listing automation template will need to fit a handful of parameters, all listed below:
- Not be archived
- Have the correct number of listing and agent tags
- For Listing Automation templates, this requires tags for exactly 1 listing, and 1 agent.
- For Contact and Seasonal Automation templates, this requires tags for exactly 0 listings, and 1 agent.
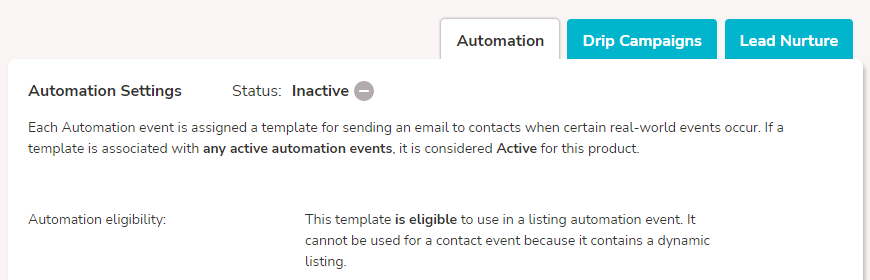
Unsure if your template fits the requirements? Check out the 'Automation' tab on the templates page to see if your template fits:
To setup your Automation templates, click Automation from your navigation bar.
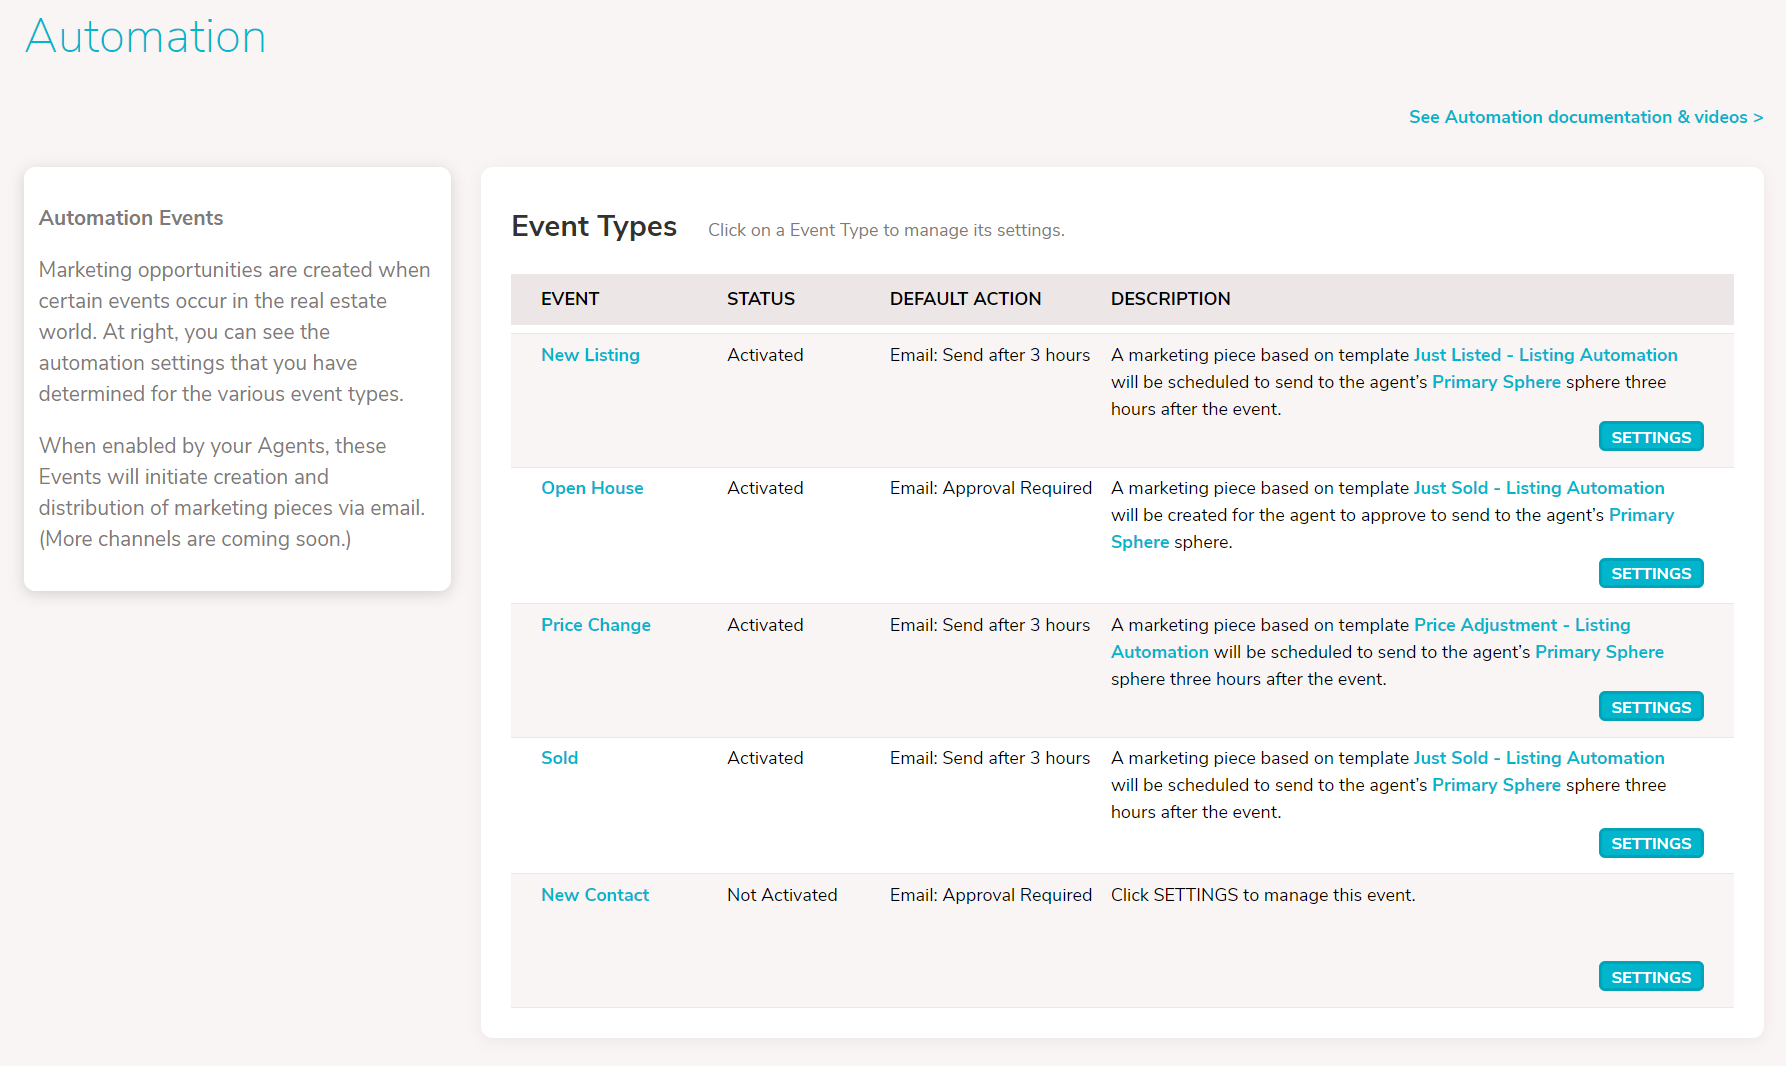
From there, you will find all your available Event Types.
Next to any of those, click 'Settings'.
Settings for Listing Automation Events:
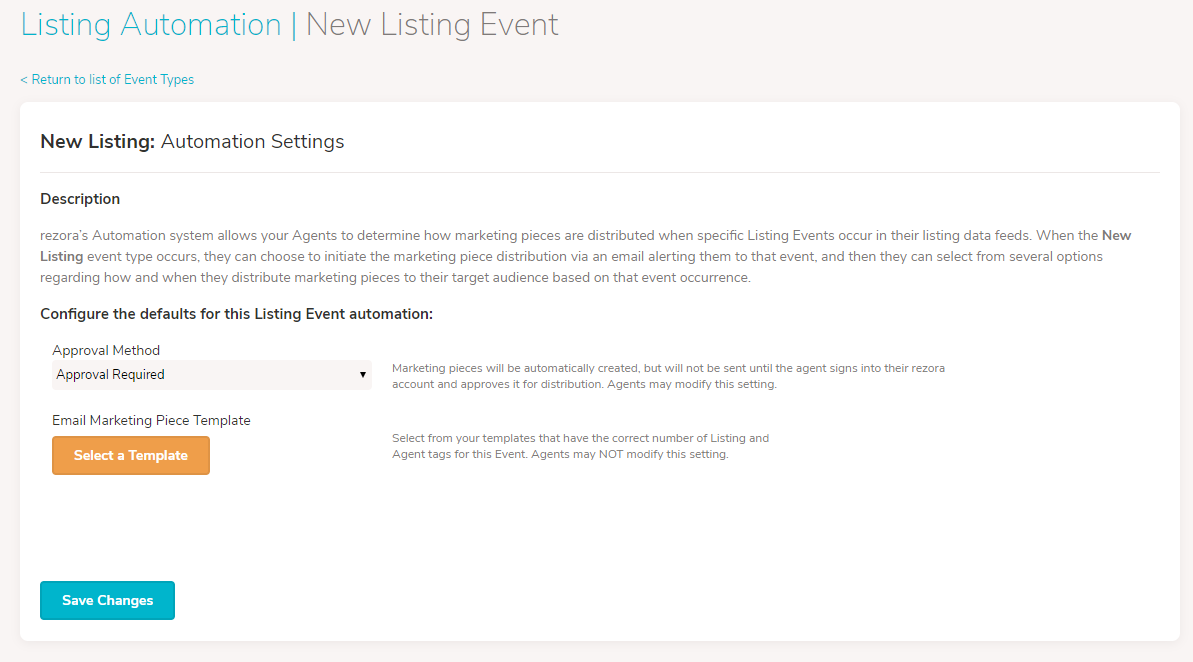
Here you will set three very important settings...
Default Event Action:
- Email: Approval Required
- Email: Send after 3 hours
- Email: Immediate Send
- Notify Agent
These settings will be the default setting an agent sees when they turn on listing automation within their own account, however, they can then choose their own setting. Not sure which to pick here? We recommend starting with "Approval Required".
:
You will also set the Template that will be used for the listing event. The template will need to meet the parameters listed above, and we also recommend making sure the template is fully ready-to-send without any direct/manual edits needing to be performed by the agent (though depending on the template you choose they may still be able to make some edits).
Default Sphere:
Finally set the Default Sphere, which the agent can also overwrite when they set this up within their own account, by selecting one of their other Spheres or Distribution Lists.
Settings for Contact Automation Events:
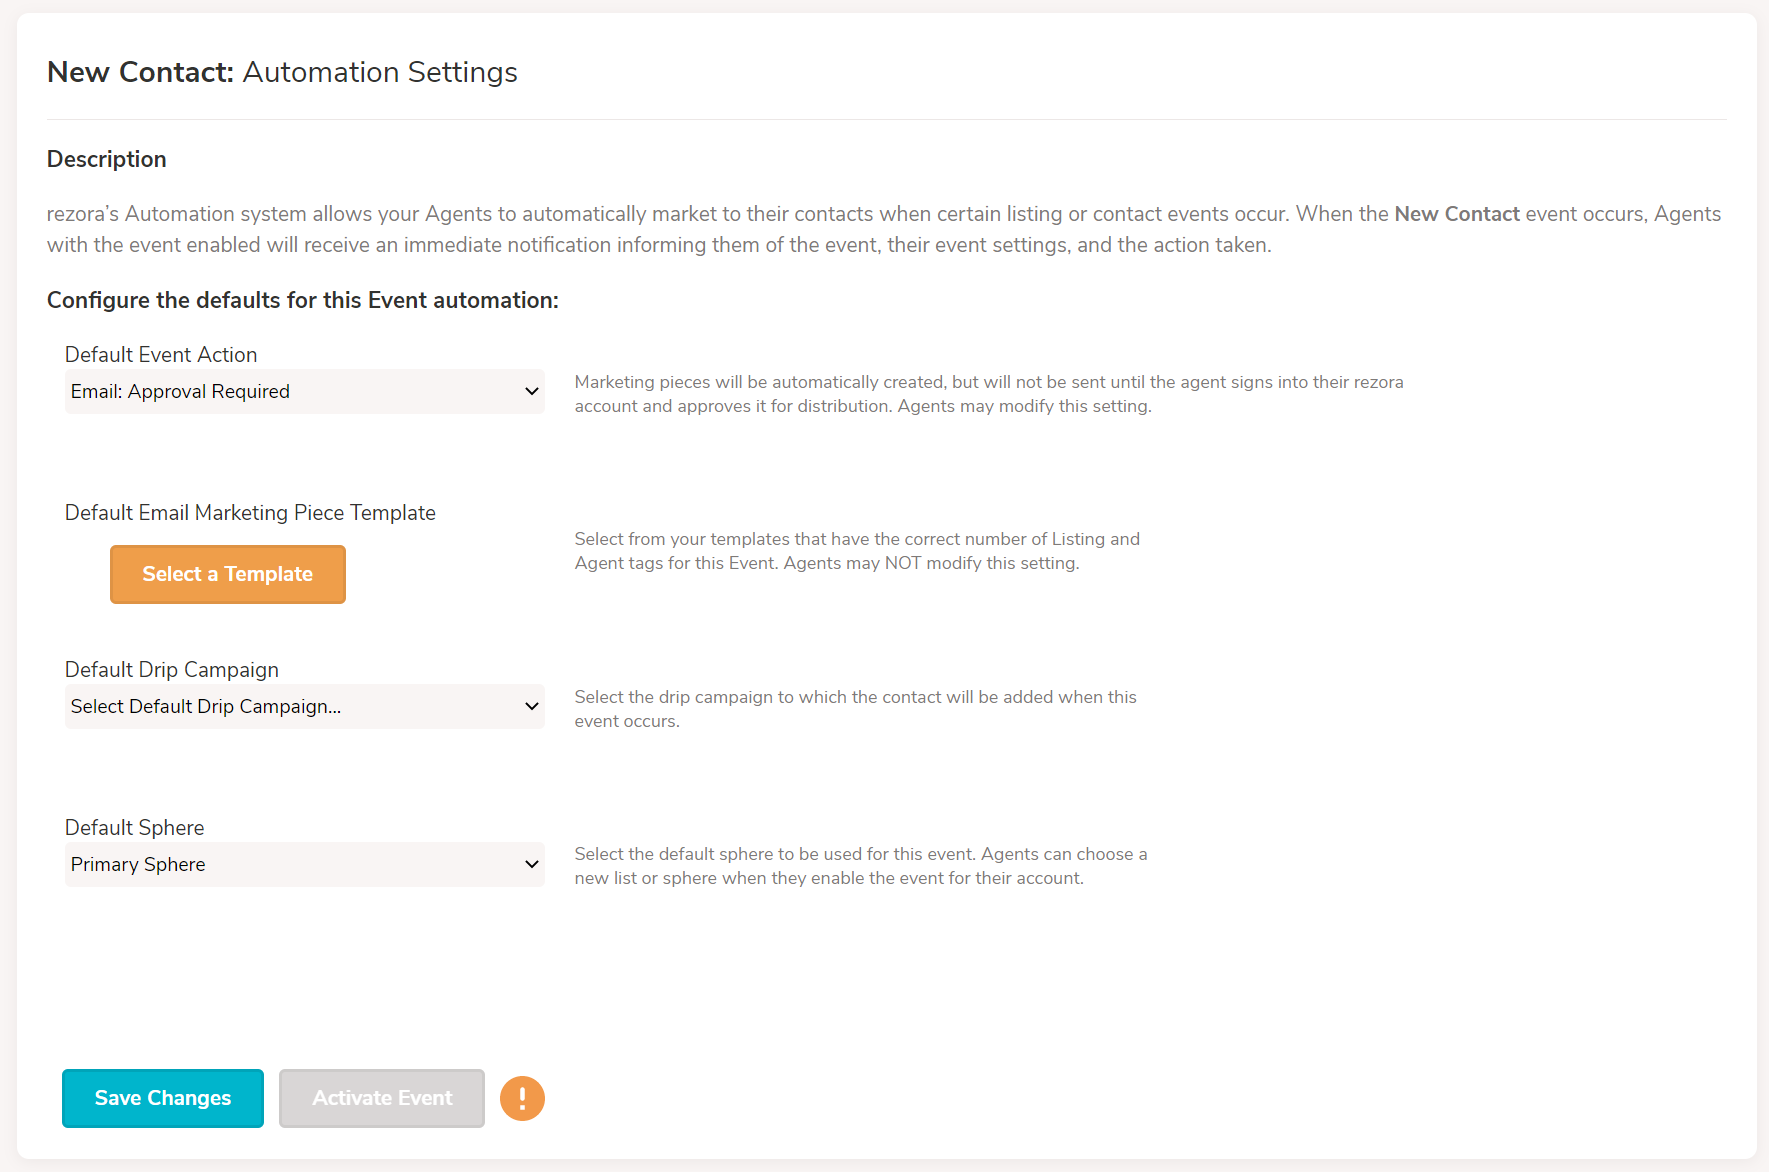
Here you will set some important settings as well:
Default Event Action:
-
Email: Require Approval
-
Email: Send after 3-hour delay
-
Email: Immediate Send
-
Notify Agent
-
Add to Drip Campaign
-
Add to Sphere
:
For any of the 'Email' Event Actions above, the template selected here will be the one used to create the email send.
For the 'Add to Drip Campaign' Event Action above, the drip campaign selected here will be the campaign the contact is added to. *Note: This option is only available if your company has the Drip Campaigns feature enabled.
Default Sphere:
For the 'Add to Sphere' Event Action above, the sphere selected here will be the sphere the contact is added to.
NOTE: Setting default actions for Drip Campaign and Sphere will not automatically cause this event to occur. For example, if an agent chooses one of the 'Email' options for their Event Action, the 'Add to Drip Campaign' action will not occur. Likewise, if an agent selects the 'Add to Sphere' Event Action, no 'Email' event will occur. Only the Event Action the agent chooses will end up taking place.
Settings for Seasonal Automation Events:
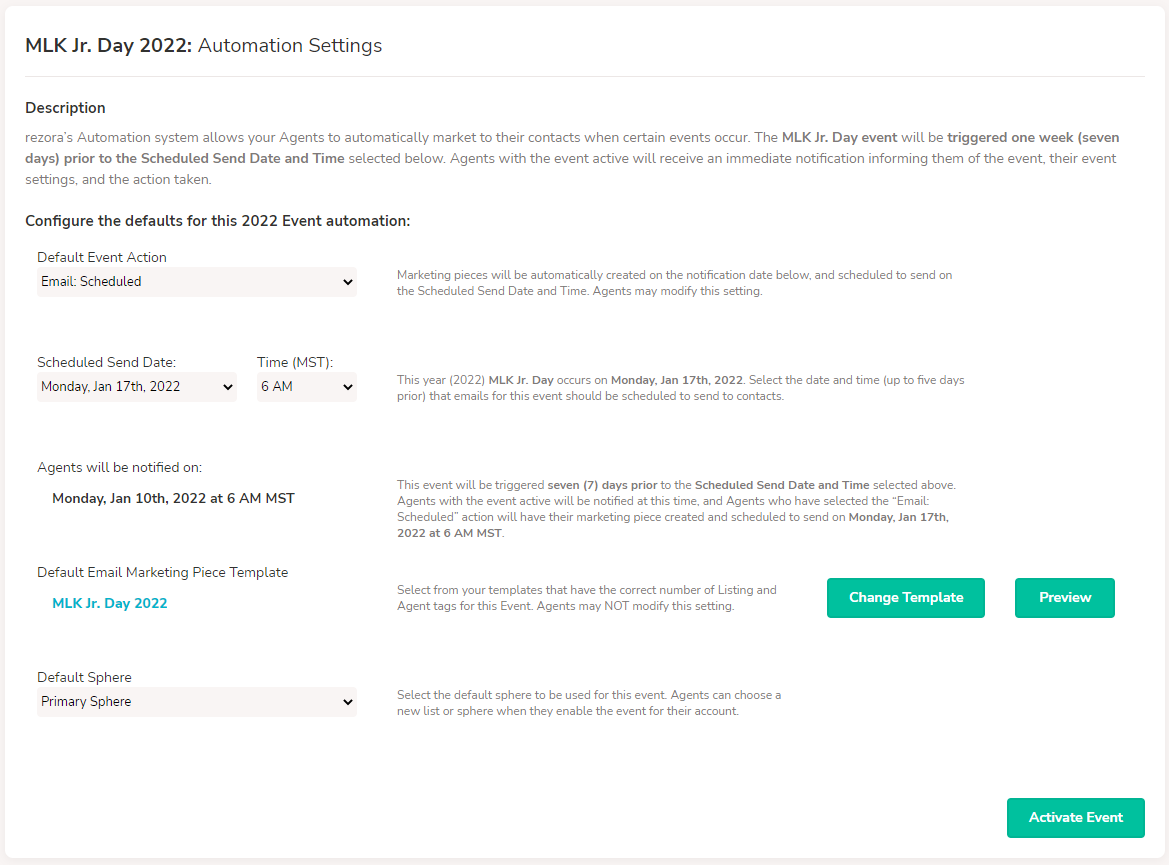
Default Event Action:
- Notify Agent
- Email: Approval Required
- Email: Scheduled
Scheduled Send Date:
Here you can set the Date/Time of the send event, up to five days prior to the event itself. Agents will also be notified seven days prior to the Scheduled Date/Time selected.
Default Sphere:
Finally set the Default Sphere, which the agent can also overwrite when they set this up within their own account, by selecting one of their other Spheres or Distribution Lists.